 From professionals for professionals
 Satisfied customers

If you want to do something good for your feet, spend a little time with them. The so-called cosmetic foot care can easily be done at home. All you need are a few utensils and some time. We show you how to do the perfect foot care at home.
What is a pedicure?
Pedicure comes from the Latin word "pes", which means "foot". In contrast, there is "manicure", which is hand care. A distinction is made between cosmetic and medical foot care. But what is done in foot care? Cosmetic foot care mainly involves
- foot bath
- peeling
- removing calluses
- cutting toenails
- moisturizing
Cosmetic foot care can easily be done at home. But corns, nail fungus, ingrown and inflamed toenails are best left to a podiatrist. Problem areas on the feet that are related to diabetes should also be treated by a specialist.

Strengthening toenails with UV gel
Due to the special composition of the Pedi Gel Series, it is particularly suitable for nail modeling on the foot. Because these nails also deserve attention. Our UV/LED gels for professional foot care are specially developed for pedicures. The toenail is subjected to particular stress and therefore needs a flexible but stable nail gel and special care. We also want beautiful, well-groomed and healthy nails on our feet. In medical foot care, our Pedi Gels are used, for example, to attach nail braces for ingrown toenails.
- highly elastic
- extremely good adhesion
- free of methacrylic acid
- HEMA free
- vegan

Pedi silver clear with silver citrate and antifungals demonstrably reduces germ contamination. Even in the cured state, a reduction in germ count occurs after just 2 days. The silver citrate and antifungals contained damage the fungal pathogen, stop its activity and prevent nail infections. After application, it acts like a protective shield on the toenail and protects against microbial influences.
Application:
- Disinfect and shorten the nails, remove the cuticles and gently buff the toenail.
- For nails with slight fungal infection, apply Emmi-Nail Pedi Connector.
- Apply a thin layer of Pedi Base Gel and cure it.
- Then apply one of our Emmi-Nail Pedi Silver Builder Gels and cure it.
- For unevenness or discoloration, apply Emmi-Nail Pedi Skin Color Gel and cure it.
- If desired, you can create a smile line with Emmi-Nail Pedi French and cure it again.
- Finally, seal with Emmi-Nail Pedi Sealing.
Our high-quality tools and care products are specially designed to offer you a professional pedicure experience. Treat yourself to the care your feet deserve and enjoy the feeling of softness and freshness with every step. Order now and take the first step towards beautiful, well-groomed feet.
How to do a pedicure at home?
Step 1: Foot bath
A pleasant foot bath softens chapped areas on the foot and softens the toenails. It is best to remove nail polish beforehand with a nail polish remover and cell pads. Dirt is best removed with a little shower gel or soap. Don't forget the areas between the toes. The water should be between 36°C and 40°C; soak feet for a maximum of 10 minutes. If you like, add a little lavender oil, lemon juice or apple cider vinegar to the water to make it easier to remove calluses later. For smoother feet, choose a bath additive with salicylic acid or a mixture of olive oil and coarse sea salt. Mint or rosemary gives a fresh kick.
Step 2: Peeling
A peeling removes dead skin cells from the feet. Here you can either use our hand peel or mix it yourself from two parts olive oil and one part coarse sea salt or sugar. The peeling is then massaged in with circular movements and already removes the first calluses.
Step 3: Removing calluses
For normal calluses, the peeling is usually enough; you can then gently sand off the remaining residue with a pumice stone, a callus grater or a callus file. Please do not go too deep, but work very carefully. Calluses are a protective mechanism; the more the respective area is stressed, the more calluses grow back. Therefore, the file or grater should only be used every two weeks to avoid stronger callus growth. If you have problems with stubborn calluses, you can get advice on special products in the pharmacy.
Step 4: Cutting toenails
To prevent toenails from ingrowing and to prevent nail bed inflammation, it is important to cut toenails straight. Even if it may seem a little strange at first because you might file your fingernails in a different shape, it makes medical sense to pay attention to the correct shape here. Whether nail scissors or nail clippers are better, everyone has to try for themselves. It is important that you can handle them well and follow the following tips:
- Do not cut nails too short; the nail corners should lie freely on the lateral skin edge.
- The corners of the toenails remain straight and are not rounded.
- Do not file the nails to a point, but pay attention to a straight shape.
- The nail edge can finally be smoothed with a file. Place the file gently on the upper
- nail edge and file downwards away from the toe and thus round off the cut edge from top to bottom.

Step 5: Removing cuticles
Especially on the feet, excess cuticles develop due to the stress caused by tight shoes or the friction of socks. To prevent these dead skin parts from tearing and painful inflammations from forming, they should be removed regularly. Cuticles can best be pushed back with a rosewood stick and carefully snipped off. Cuticles should only be removed with scissors by a trained professional.
Step 6: Moisturizing and massaging feet
Depending on your needs, use a rich or anti-perspirant cream and massage it in with circular movements. Of course, you can also use our hand cream with grapeseed oil for this.
How to do a pedicure with nail polish?
After the toenails have dried well, we treat ourselves to a portion of color. But how does the nail polish color last as long as possible? From experience, it is best to apply the nail polish pedicure only the next day, as the toenails have absorbed a lot of moisture through the treatment and the nail polish only adheres well to dry and grease-free nails. To avoid smudges, we use a toe separator to ensure a safe distance between the toes. Then we prime the toenails with our 6-in-1 clear polish. The base coat acts as a ridge filler, leveling out small irregularities on the nail and providing the perfect base for painting. After drying, the colored polish is applied. When the first coat is well dried, a second coat provides a more intense color result. Now our all-rounder polish is used again as a quick dryer and sealer, so that the color lasts a long time and does not chip. Well-groomed and beautiful toenails with nail polish pedicure are ready.

Strengthen natural nails with gel
For thin and brittle nails, you can apply natural nail gel. If you are doing a natural nail reinforcement with gel for the first time, you should definitely familiarize yourself with the material and its chemical properties. Light-curing gel consists of so-called monomers and acrylates. Monomers are small molecules that combine to form long chains with a trigger such as an LED lamp. This usually causes a slight heat development and a sticky layer, the so-called inhibition layer. The products for natural nail reinforcement with gel are composed in the same way as tooth fillings. They are harmless to health. If you want to strengthen natural nails with gel, you should pay attention to proper application:
- Prepare the natural nail and mattify it with a buffer.
- For problem nails: Apply Emmi-Nail Prep&Prime and let it air dry briefly, and additionally apply our Emmi-Nail Base Coat S2.
- Apply Emmi-Nail Rubber Base like nail polish and cure (120 sec. under UV/LED or 120 sec. UV light).
- For an extension or reinforcement, apply the Rubber Base again and cure again.
- Do not apply the gel too thickly; it is better to work in 2 or more layers and cure it in between.
- Now apply an Emmi-Nail UV polish or Quickie as desired and cure it.
- The Emmi-Nail UV/LED polish Base-/Top Coat is used as a sealant. (for Quickies, no sealing is necessary, as these polishes cure without an inhibition layer).
- After curing, remove the inhibition layer with the High-Gloss Cleaner.
How long does nail reinforcement last?
How long a natural nail reinforcement with gel lasts depends on the product. UV nail polishes last up to three weeks and can be removed with remover. Conventional gel nails can be refilled after two to three weeks and essentially strengthen the nail indefinitely until the gel is filed off. Since the Nature Series consists of UV gel, it cannot simply be removed with a liquid. However, the reinforcement looks so natural that you can simply let it grow out as needed.
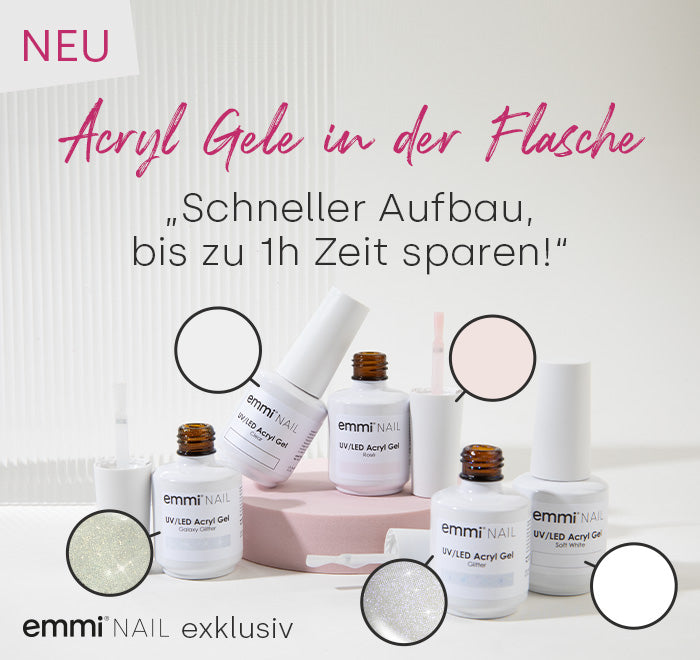
The modeling is very stable and the gels are still easy to file. The Nature Gels are also ideal for refills, for overgrown gel nails. Our range of nail gels in a bottle ranges from a primer gel to three colored builder gels to a sealing gel.
Our range of natural nail gel
Our new emmi®NAIL Nature Gels in the practical brush bottle are perfectly suited to make natural nail reinforcement look natural. Through simple, quick and clean work, they make everyday studio life easier and can also be used at home. You have a brush for each gel, which is protected from dirt, dust and UV radiation in the bottle.
At emmi®Nail, you benefit from many years of experience that has gone into the development of our professional nail design products. The natural nail gel has a beautiful color and convinces all customers who love the natural look. If you want to strengthen your natural nails with gel, you can now conveniently order on account in our online shop.