 All products are TPO-free.
 Satisfied customers
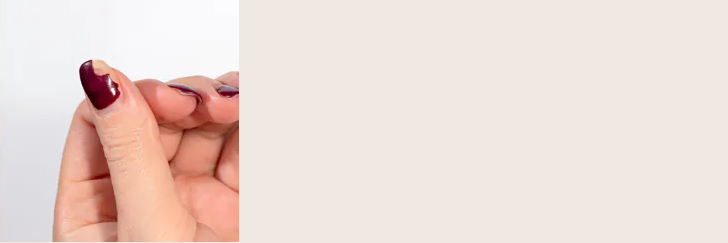
Beautiful, long nails are the dream of many women. Even if nature hasn't provided the necessary conditions, it doesn't have to remain unfulfilled. With nail extensions, you can instantly bring your gel nails and natural nails to the desired length and shape.
There are basically two options for this:
The simplest option is nail extensions with nail tips . Tips are artificial plastic fingernails that are glued to the natural nail with a special superglue. They can then be shaped into the desired shape using a tip cutter. The remaining natural nail is then reinforced with nail gel .
For more experienced nail designers, extensions with a nail stencil are suitable. A thin, self-adhesive layer is slid under the natural nail, onto which the gel or acrylic powder is then applied. After it has hardened, the stencil is removed and the modeling is completed. The nail stencil is much more flexible in its application than tips and can be better adapted to the natural nail shape.
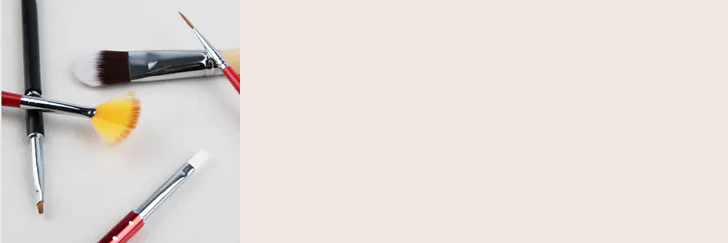
Whether you want to extend your nails with nail tips or a stencil extension is up to you. The foundation for magical results with both methods is the materials you use for nail sculpting. From emmi®NAIL, you can get high-quality tips and stencils that guarantee stunningly beautiful results. You'll also find the necessary accessories for nail repair and natural nail reinforcement in our online shop.
What are fiberglass nails?
Nail extensions can also be created using fine fiberglass strips. This technique is a bit more complex and requires fiberglass glue and an activator. If you're new to nail design , you can easily create fiberglass nails yourself using emmi®NAIL Fiberglass Gel . Fiberglass gel contains fine fiberglass particles, which provide additional stability for the nail. However, it remains flexible enough to feel completely natural on the nail bed. Because it's so robust, it's particularly suitable for long fingernails. If you prefer short nails, fiberglass gel is also a good option. It's a bit thicker and doesn't run into the nail fold as easily during application. This makes it easy for beginners to use. If you're unsure about the application, it's best to seek out a high-quality nail salon. If you have enough time and patience and use high-quality products, you can also try it yourself using the following instructions.
Instructions for the extension with tips:
- Prepare natural nail, remove cuticles, roughen nail with the buffer
- Select the desired size nail tip. Important: The tips must be exactly the right size for the nail surface and must not be under pressure.
Remember: the more carefully you work here, the better the nail extension will hold. - Attach the tips to the nail with a special nail tip adhesive . Just a tiny drop is enough. Avoid creating any bubbles. Make sure the center of the tips is aligned with the back bones of your fingers. Now trim the tips with the tip cutter.
- Now apply the adhesive gel and cure it in the UV device or UV/LED device .
- Now it's time to apply the gel to your nails. Apply the builder gel to your fingernails and hold your hand with the back of your hand facing down for three seconds to achieve the optimal C-curve.
- Cure again under the UV lamp and file the finished nails into shape.
- Now you create the nail design of your choice with color gel or nail art .
- Finally, the fingernails are sealed.

Instructions for extension with template:
- Prepare the nail as usual and apply primer if there are adhesion problems.
- Apply primer gel and cure
- Adjust the stencil to the prepared nail and trim if necessary. Make sure it fits perfectly on the nail and there are no gaps. Important: For perfect stiletto nails, the stencil should be centered. The side lines of the stencil must be parallel to the nail.
- Apply the builder gel, first to the nail and then to the stencil. After application, cure the nails under the UV lamp. Tip: Apply another layer of builder gel for more hold. Then cure again.
- Now the stencils can be removed from the nail.
- We file the nails until the desired shape is achieved.
- Next, add color gel, glitter , or whatever you like.
- Finally, create your desired finish with an emmi®NAIL sealing gel . ➠ Video instructions for the stencil
Stencil roll shapes
- Narrow stencil roll for narrow nails.
- Wide stencil roll for nails with a wide nail bed.
- Strong Form round stencil roll for all nail shapes.
- Stencil roll Strong Form pointed especially for special shapes and extra lengths such as Stiletto or Edge.
- The Wings “Stiletto” stencil roll also has two adhesive strips that you can stick together to better adhere the nail stencil to your finger.
The self-adhesive stencils are made of high-quality aluminum foil. The special paper provides optimal shaping. Extremely strong adhesive prevents the stencil from slipping on the finger. The printed scale facilitates individual extensions when using gel or acrylic nails. You can also easily repair chipped or broken nail corners with the Emmi-Nail stencil roll.
How do I use full cover tips?
- Prepare your natural nails as usual.
- Now select the appropriate tip for your natural nail. Use a slightly larger tip, as it will need to be filled with gel.
- Roughen the inside of the tip with a buffer or bit in the area of the natural nail.
- Now apply the Emmi-Nail Prep & Prime to the natural nail and let it air dry briefly.
- Then apply a thin layer of Base Coat S2 to the natural nail and let it harden.
- Apply the press-on glue to the inside of the tip.
- Place the tip on the nail plate, leaving a gap of approximately 1 mm from the upper nail fold. Make sure that no air bubbles form during placement.
- Now cure the nail. TIP: Press the tip onto the nail for the first 10 seconds while curing. After that, the nail can be cured for 120 seconds.
- Buffer the nail tip and apply the desired color gel or UV varnish, let the nail cure, and finally seal your finished design.
What is a refill?
During a refill, the overgrown nail is recoated with acrylic or gel. A nail grows approximately 0.5 mm to 1.2 mm per week. Therefore, a refill is recommended every three to four weeks.
In a nail salon or at home, you roughen up the entire model and file down any areas where lifts have formed. Lifts are air pockets beneath the nail model. Then, you apply a bonding agent to the natural nail in the exposed areas and rebuild the nail layer by layer. If the majority of the model needs to be removed, you should file off the remaining nails and start from scratch.
A tip extension can be filled in until the tip is completely shortened. When extending with a stencil, you only use a new stencil if you want the nail to be longer than before.