 Alle Produkte TPO-frei
 Satisfied customers
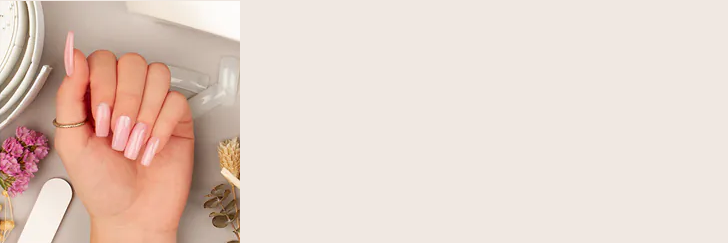
For strong, well-groomed nails, you'd normally visit a professional nail salon. Thanks to high-quality products, you can now also use acrylic nail extensions at home. However, nail extensions with acrylic require some practice in handling the material.
And if you're ever stuck, just call us at +49 6105 406780 or email us at info@emmi-nail.de. Our trained staff will be happy to help you with any questions you may have about nail design .

What are acrylic nails made of?
Acrylic nails consist of a mixture of acrylic powder and acrylic hardener, known as liquid. Using a brush, the powder and liquid are formed into a small ball and used for nail modeling. Unlike gel, the mixture simply dries in the air and hardens.
For the optimal shape of the sculpted nail, you can bend the curve with a pinch stick and a pinch clamp before the material is completely dry. Once the acrylic is sculpted, the fingernail is filed into the correct shape and polished with a polishing file.
How do I do acrylic nails?
If you want to strengthen or lengthen your nails with acrylic, you can use pre-mixed acrylic gel or powder and liquid. Unlike gel, the correct mixing ratio is crucial. Additionally, the acrylic mixture dries in the air, so you can't take as much time to shape it as you would with a UV curing unit . Dip the brush into the liquid and dab it lightly on a tissue. Then, with the wet brush, form a small ball in the powder, which you can use for further shaping. The instructions show the application for a classic French nail design:
- Prepare the nail as usual: push back the cuticles, file the nail into shape , and roughen it. Apply the stencil, making sure there is no gap between the paper and the natural nail.
- Extend the nail bed with pink camouflage powder and work out the smile line before adding the white tip.
- Apply white powder directly to the pre-formed smile line. Make sure the material is flush but not overlapping. For a unique look, try our vibrant colored acrylic.
- Sculpt the structure in the stress area, i.e., the C-curve, with transparent pink. Finish the tunnel with a pinch clamp.
- File the free end of the nail and the surface into shape with a 180-grit file. Repeat with a 240-grit file.
- Buff your nails to a high shine with a buffer and polishing file. Gradually move to finer grits until your nails shine like glass.
- For strong lifts, it's advisable to apply primer to the natural nail. This creates an adhesive film on the natural nail and reduces the risk of oil buildup. Apply sparingly to the cuticle area. Avoid getting the primer on the cuticle, as this will cause adhesion problems.
- In our practical starter set we have put together everything you need for a good introduction to acrylic modeling.

Which nail design is suitable for acrylic nails?
Acrylic nails are stable and extremely robust . The powder-and-liquid system allows you to precisely control the amount of material applied to the nail. Acrylic powder is therefore ideal for extremely long and extravagant nails , for lightweight, everyday nail extensions, and for thin, barely noticeable natural nail reinforcement .
Which design is chosen for acrylic nails depends largely on the nail shape and length the customer wants.
- Long nails like ballerina or stiletto nails offer plenty of space. Nail art and color gradients, like the trendy ombré look, are particularly effective here. Of course, long nails can also be simply decorated with nail art rhinestones or small stamped tendrils. It's a matter of taste.
- For those who prefer short, understated nails, delicate colors with emmi®NAIL color gels are the first choice. With the super-spreadable UV polishes, you can also give your nail reinforcement a subtly elegant nail design in no time.
Why not try emmi®NAIL Color Acrylic ? This allows you to create the structure and design in a single step. Then, depending on your mood, you can simply seal the nail with glitter or matte sealant , or decorate it with stickers and tattoos .
How do I remove acrylic nails?
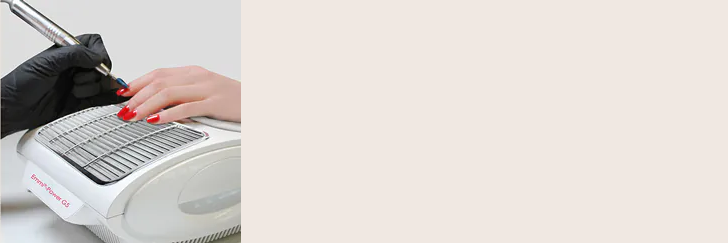
Unlike gel nails, acrylic nails are extremely hard and therefore difficult to file down. It takes a relatively long time to file with a conventional hand file. We definitely recommend using an electric drill with the appropriate bit attachments to remove acrylic nails.
You can choose from a variety of shapes , grits , and materials for the grinding heads. You can even find small, round grinding heads at emmi®NAIL for removing cuticles before sculpting. So, purchasing a nail grinder is worthwhile for more than just acrylic nails. It allows you to complete any filing task in the nail salon or at home perfectly and effortlessly.
You won't want to put it down when refilling gel, filing tip transitions, and smoothing the build-up layer. We recommend training with a professional nail designer at the Emmi Academy before use. When working with the electric file, the cutter heads rotate at high speeds. Improper handling can cause significant damage to the delicate nail plate and nail bed.

How do acrylic nails work?
Acrylic nails require some practice, but can be easily recreated after training or with good instructions. We've already prepared a short step-by-step guide for you.
To make it even easier for you, we have a detailed video tutorial on acrylic powder nail art.
Video tutorial acrylic nails
Quality Made in Germany
At emmi®NAIL, quality is our top priority. High-quality and safe ingredients are essential, especially when it comes to acrylic powders and liquids.
They not only ensure the health of nail technicians and clients, but also your success. In our online shop, you'll find the complete range of nail products and accessories for nail salons.
Order now conveniently and on account and let our products convince you. As a studio customer, you also benefit from great price advantages and promotions.