 Von Profis für Profis
 Zufriedene Kunden
Sie sind die High Heels unter den Nägeln – Stiletto Nails. Mit dieser Nagelform ziehen Sie garantiert alle Blicke auf sich. Und dabei wirken Stilettos ungemein feminin. Denn Stiletto Nails kombinieren Eleganz mit Extravaganz. Voraussetzung für ein überzeugendes Ergebnis bei Stiletto Nails ist eine Nagelverlängerung, die jeden Nageldesigner vor eine Herausforderung stellt. Wie Sie sich lange, spitze Nägel selbst zaubern, erfahren Sie in unserer Anleitung sowie alles, was es über Stiletto Nails zu wissen gibt. Zum Beispiel für wen sich diese Nagelform besonders eignet.

Was sind Stiletto Nails?
Als Stiletto Nails wird eine ganz besonders extravagante Nagelform bezeichnet: Die Fingernägel ragen dabei klassischerweise mindestens drei Zentimeter über die Fingerkuppe hinaus und laufen dabei spitz nach oben zu. Für echte Stiletto Nails ist daher eine Nagelverlängerung erforderlich. Der perfekte Beauty-Trend für alle Nail-Fashionistas, die sich die Nägel mit einem aufregenden Nageldesign gestalten möchten.
Denn so viel Nagel lässt dann ganz viel Platz für eine aufregende Nailart, sieht aber schon allein als Fullcover in Schwarz oder Rot atemberaubend aus. Diese Nägel wirken bereits durch ihre Form und ihre aufsehenerregende Länge.
Mit emmi®-nail zu gelungenen Stiletto Nails
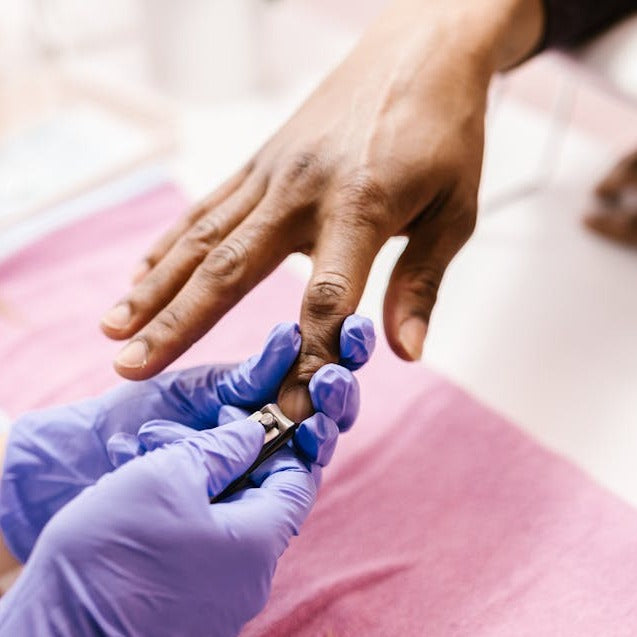
Für Anfängerinnen eignet sich diese Nagelform eher weniger zum Selbstmodellieren. Denn die extravaganten Fingernägel erfordern einiges an Erfahrung und – im wahrsten Sinne des Wortes – Fingerspitzengefühl, damit sie gelingen. Naturnägel lassen sich kaum in dieser ultralangen Nagelform feilen. Aber für die Nagelmodellage mit Gel sind Stilettos wie gemacht.
Für die Nagelverlängerung bietet sich die Schablonentechnik an. Aber auch mit Tips lassen sich Stilettos modellieren. Von emmi®-nail finden Sie sowohl vorgefertigte Schablonen als auch Tips, die die Form der Nägel vorgeben.
Glitter, Muster mit Acryl-Malfarben oder Nail Tattoos: Was die Nailart angeht, sind Ihnen mit Stiletto Nails kaum Grenzen gesetzt. Als Naildesign geht dabei alles, was Ihnen gefällt! Von Farben bis zu Effekten können Sie Ihrer Fantasie freien Lauf lassen. Die Nailart-Produkte, die Sie dafür benötigen, finden Sie natürlich wie gewohnt im Onlineshop von emmi®-nail.
Schritt für Schritt zu Stiletto Nails: Anleitung
Sie wollen Ihre Fingernägel in die extravagante Form bringen? Hier erklären wir Ihnen Schritt für Schritt, wie Ihnen das mit der Schablonentechnik und Pinchen gelingt.
-
Vorbereitung
Wie für jede Acryl- oder Gel-Nagelmodellage benötigen auch Stiletto Nails eine entsprechende Vorbereitung. Bereiten Sie also wie gewohnt Ihre Nägel auf das Nageldesign vor. Schieben Sie zunächst die Nagelhaut vorsichtig zurück und buffern Sie die Nageloberfläche an. Tragen Sie einen Primer auf die Nägel, damit die Modellage besser auf dem Naturnagel haftet. -
Grundiergel
Sind die Nägel für die Stiletto Modellage vorbereitet, tragen Sie ein Grundiergel auf und lassen Sie die Nails unter der UV-Lampe aushärten. -
Schablone
Nun benötigen Sie die Schablone von der emmi®-nail Schablonenrolle Stiletto. Passen Sie die Schablone auf den vorbereiteten Nagel an und schneiden Sie sie bei Bedarf zu. Achten Sie darauf, dass sie perfekt am Nagel anliegt und keine Lücken entstehen. Wichtig: Für perfekte Stiletto Nails sollte die Schablone mittig ausgerichtet sein. Dafür müssen die Seitenlinien der Schablone parallel zum Nagel verlaufen. -
Aufbaugel
Nun tragen Sie das Aufbaugel auf, zuerst auf den Nagel und dann auf die Schablone. Lassen Sie die Nägel nach dem Auftrag unter der UV-Lampe entsprechend aushärten.Tipp: Mit einer weiteren Schicht Aufbaugel verschaffen Sie den Nägeln mehr Halt. Dann noch einmal aushärten.
-
Pinchen
Jetzt können die Stiletto Schablonen vom Nagel. Hier ist Vorsicht gefragt. Im Anschluss können die Nails bei Bedarf, mit einer Pinch Pinzette, gepincht werden. Dazu die Pinchklemme ansetzen und unter der UV-Lampe aushärten lassen. Sind die Stiletto Nails ausgehärtet, Pinchklemme wieder entfernen. -
Feilen
Nun bekommen die Stiletto Nail ihren Feinschliff. Feilen Sie die Nägel solange, bis die gewünschte Form entstanden ist. Für Stilettos kommt dem Nachfeilen eine besonders große Bedeutung zu. Denn auf dieser Länge fällt jede Unebenheit sofort ins Auge. Gehen Sie daher besonders umsichtig vor, wenn Sie Unebenheiten mit der Feile ausgleichen und bringen Sie keine Kanten in die Nails. -
Versiegeln
Als nächstes kommt Farbe ins Spiel. Farben, Glitter oder was sonst gefällt: Auf den langen spitzen Stiletto Nails rückt die Nailart garantiert ins Zentrum der Aufmerksamkeit.Zum Schluss verpassen Sie den Stiletto Nails mit einem der emmi®-nail Versiegelungsgele ein Finish nach Wunsch. Die Nägel aushärten lassen, Schwitzschicht mit Cleaner entfernen – fertig.
Wie lange hält eine Nagelverstärkung?
Wie lange eine Naturnagelverstärkung mit Gel hält, entscheidet das Produkt. UV-Nagellacke halten bis zu drei Wochen und man kann sie mit Remover entfernen. Herkömmliche Gelnägel können nach zwei bis drei Wochen aufgefüllt werden und verstärken den Nagel im Prinzip unbegrenzt bis das Gel abgefeilt wird. Da es sich bei der Nature Serie um UV-Gel handelt, kann man sie nicht einfach mit einer Flüssigkeit entfernen. Die Verstärkung sieht allerdings so natürlich aus dass Sie sie je nach Bedarf einfach herauswachsen lassen können.
Die Modellage ist sehr stabil und die Gele lassen sich trotzdem gut feilen. Die Nature Gele sind auch ideal zum Refill, für heraus gewachsene Gelnägel, geeignet. Unser Sortiment der Nagelgele in der Flasche reicht von einem Grundiergel über drei eingefärbte Aufbaugele bis zu einem Versiegelungsgel.
Unser Sortiment an Naturnagel-Gel
Unsere neuen emmi®NAIL Nature Gele in der praktischen Pinselflasche sind perfekt geeignet, um die Naturnagelverstärkung natürlich aussehen zu lassen. Durch einfaches, schnelles und sauberes Arbeiten machen sie den Studioalltag leichter und können auch zuhause angewendet werden. Man hat für jedes Gel einen Pinsel zur Hand, der in der Flasche vor Schmutz, Staub und UV-Strahlung geschützt ist.
Bei emmi®Nail profitieren Sie von langjähriger Erfahrung, die in die Entwicklung unserer professionellen Naildesign-Produkte geflossen ist. Das Naturnagel-Gel hat eine wunderschöne Färbung und überzeugt alle Kundinnen, die den natürlichen Look lieben. Wenn Sie Ihre Naturnägel mit Gel verstärken möchten, können Sie jetzt bequem in unserem Online-Shop auf Rechnung bestellen.